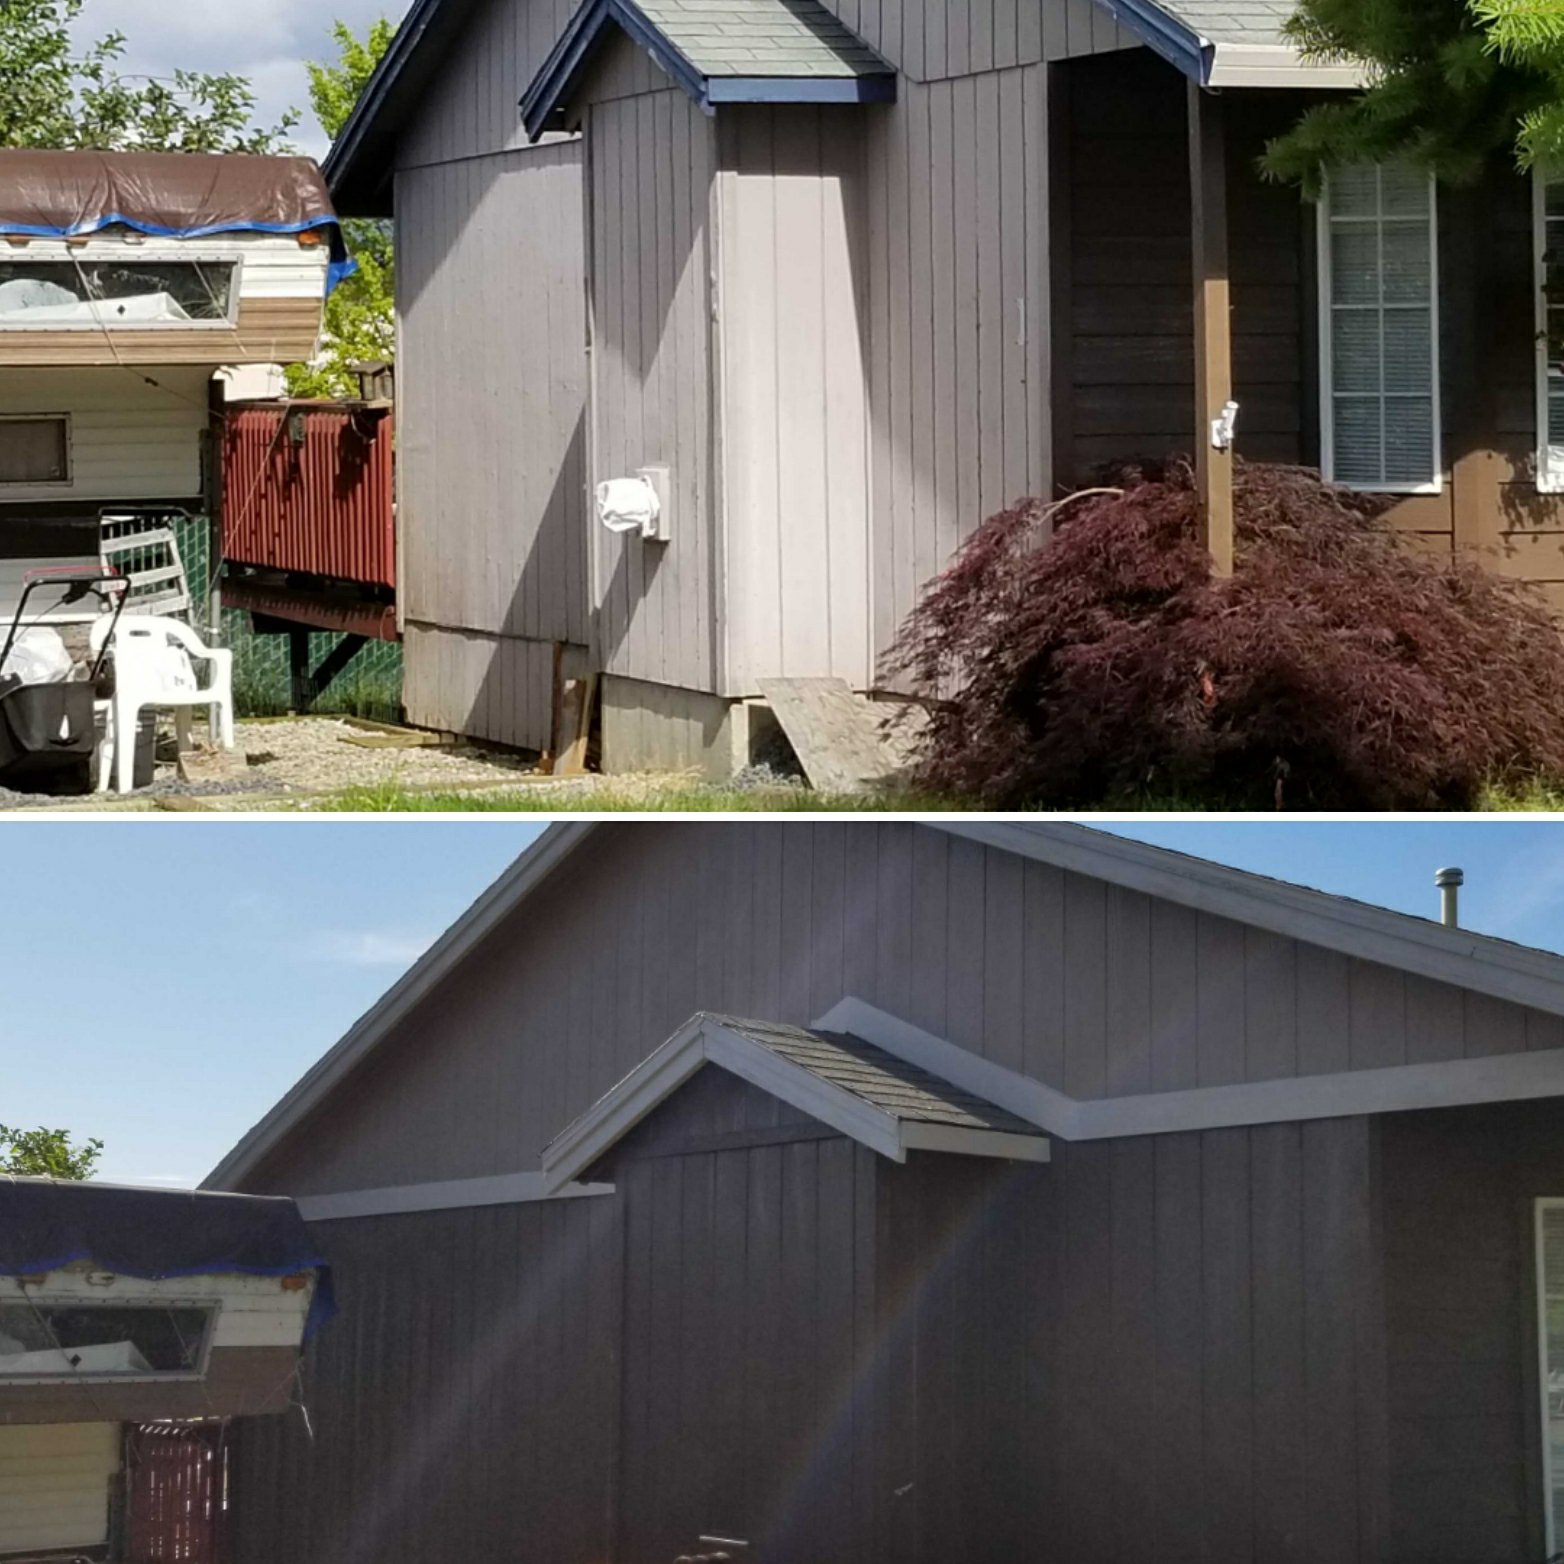

Window Removal in Sherwood: Wall Closed In, Siding Patched & Wainscoting Matched

Sometimes a window just isn’t pulling its weight. This Sherwood homeowner had one in the entry wall right next to the door, and they wanted that wall for coats and storage instead. So we took the window out and closed the wall in for good, inside and out, so it looks like the window was never there.

The Before

The window sat in the middle of the wall by the door. With the window in the way, there was only room for a handful of hooks. There was also a crack in the drywall running out from the top corner of the window.
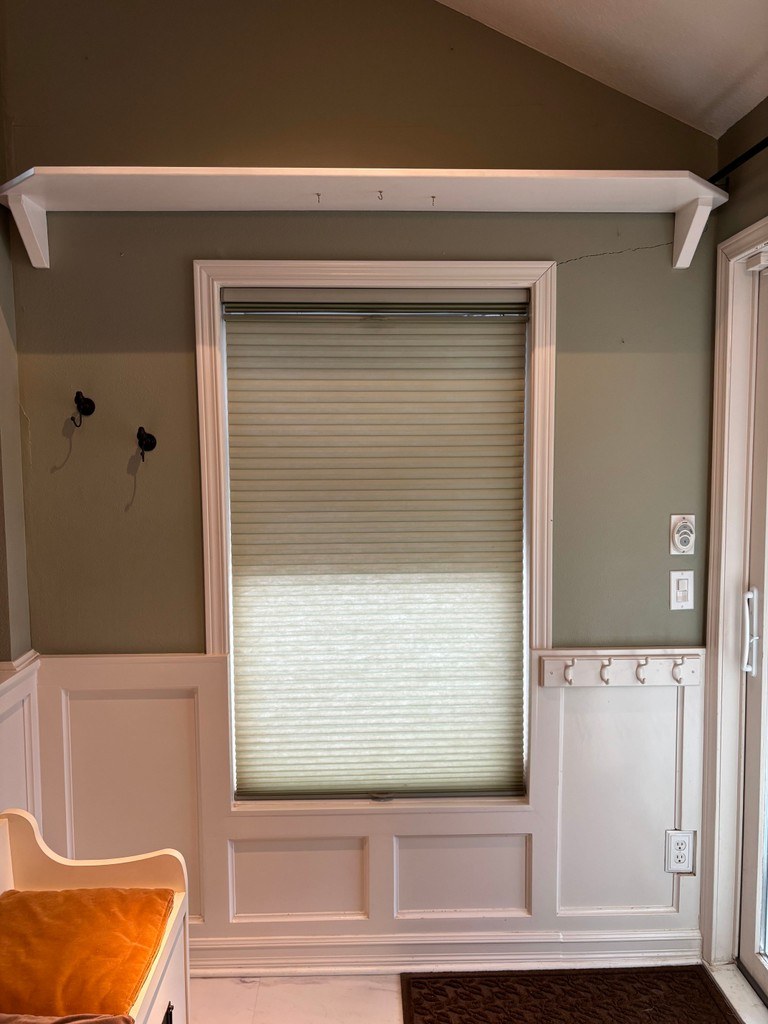
Before: a tall window with a pleated shade in a green entry wall with white wainscoting, a high white shelf above and a few coat hooks beside it
Before: a window in the entry wall, with only a few spots left for coats.

Outside, the window was set in grooved T1-11 panel siding.
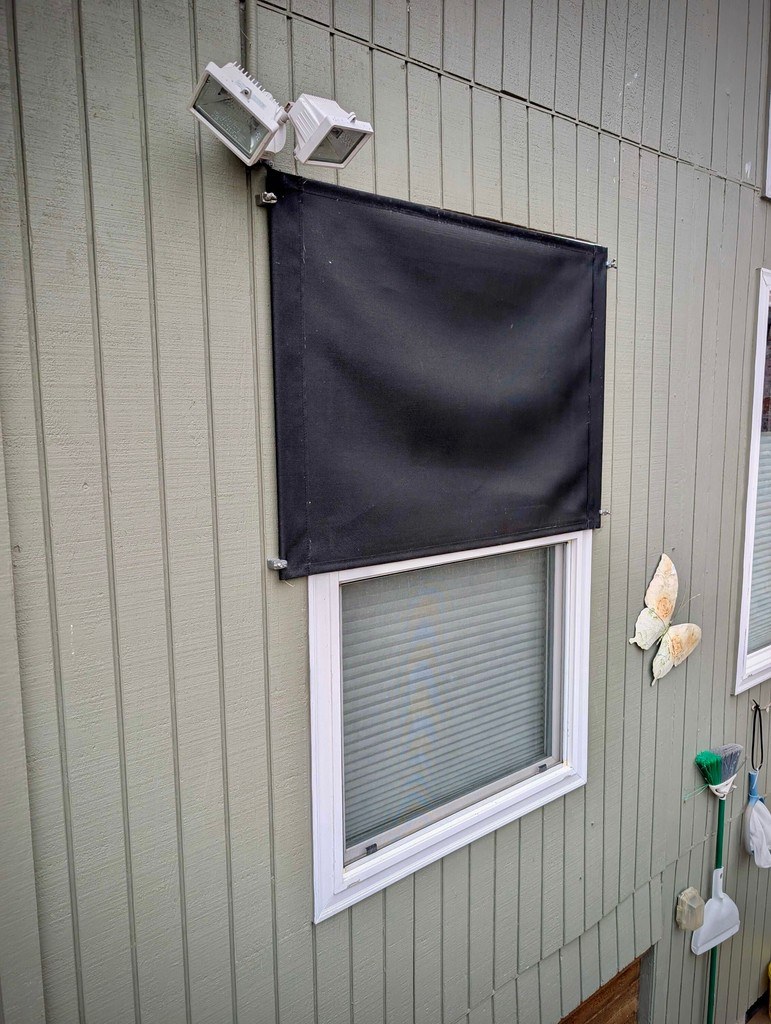
Before: exterior view of a white-framed window in gray-green grooved panel siding, with a black shade cover above it and a floodlight on the wall
Before: the window from the outside, set in grooved panel siding.

Closing Up the Outside First

When you remove a window in Oregon, the most important part is keeping the rain out. Here’s what Brian did on the outside:

    • Removed the window and its trim
    • Closed in the opening
    • Removed two sheets of siding and replaced them with new T1-11 siding, so the patch isn’t just a filled-in hole
    • Added proper flashing to keep water moving down and out
    • Caulked and painted the new siding to blend in with the rest of the house

It rained during the job, so Brian put a tarp up over the new siding to keep it dry enough to paint. Getting the outside sealed and painted before the wet season really sets in keeps a project like this from causing problems down the road.
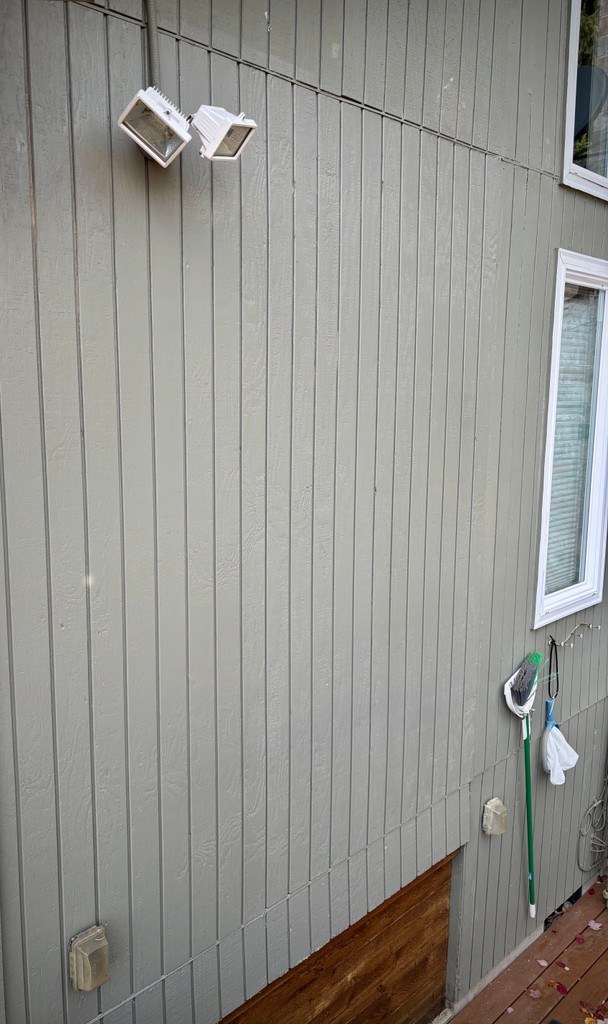
After: exterior gray-green grooved panel siding with no window, new siding panels painted to match the rest of the wall below a floodlight
After: new siding where the window used to be, flashed, caulked and painted to match.

Finishing the Inside

Inside is where the change really shows. Our team:

    • Drywalled the old window opening and replaced the cracked section of drywall
    • Repaired an inside drywall corner
    • Textured and painted the wall to match
    • Added wainscoting trim to match the other walls, so the panels now run straight across
    • Took down the high shelf and reinstalled it
    • Hung two rows of coat hooks the homeowner picked out
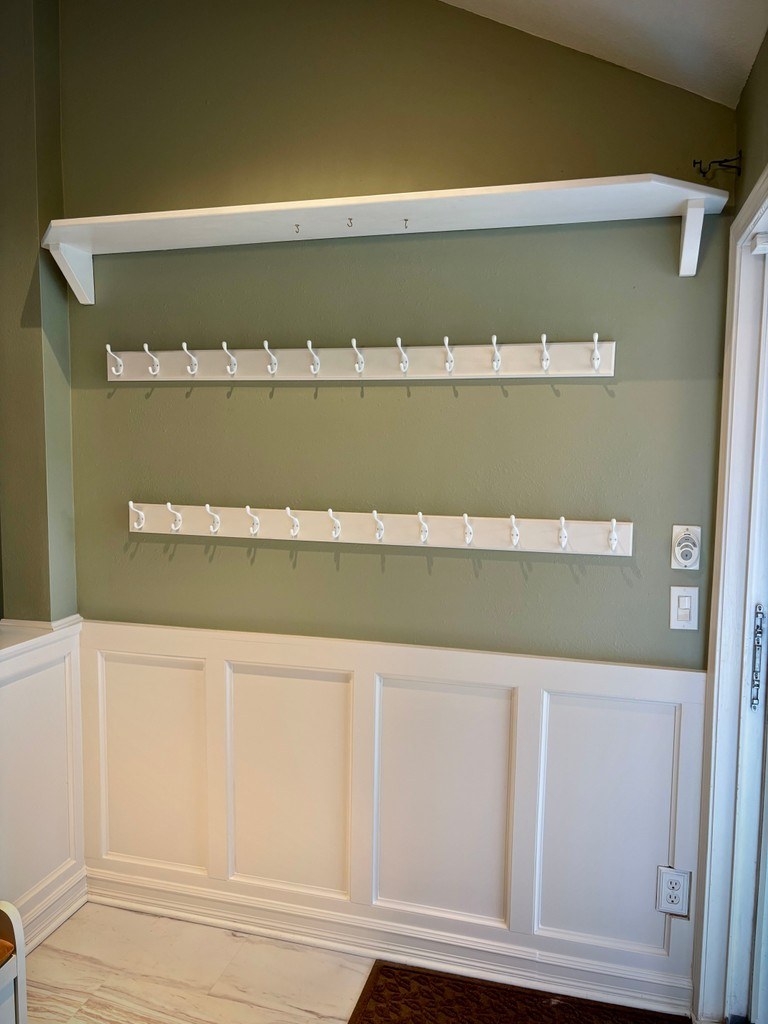
After: the same green entry wall with the window removed, white wainscoting panels across the bottom, the high shelf reinstalled and two long rows of white coat hooks
After: the window is gone. The wall is patched, textured and painted, the wainscoting runs straight across, and two rows of coat hooks fill the space.
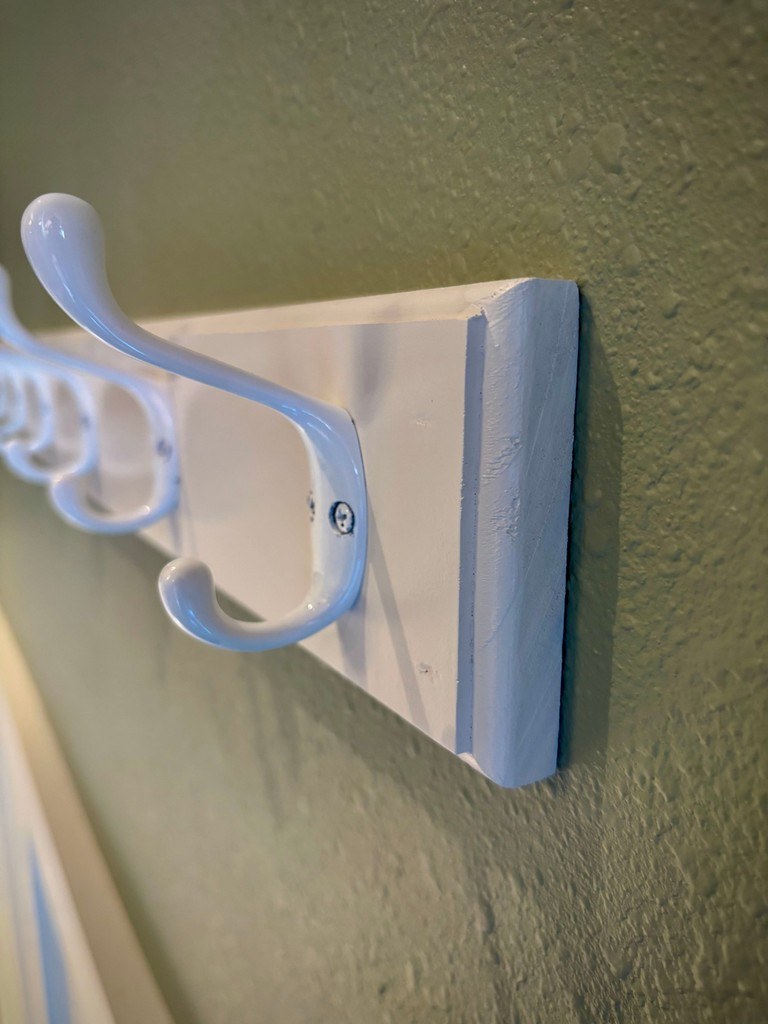
Close-up of a white painted coat hook board with white double hooks mounted on a textured green wall
Close-up of one of the new coat hook rows on the freshly textured wall.

While we were there, we also added a 4-inch trim board to another wall to protect the paint and put a few metal hooks in a closet. Brian handled this one over three days, with a hand from Gavin.

Is Removing a Window Right for You?

A window delete can make sense when:

    • You need wall space for storage, hooks, cabinets or furniture
    • A window lets in too much heat, cold or street noise
    • An old window is drafty or leaking and you don’t need it
    • You’re changing how a room is used, like turning a corner into a mudroom

The key is doing it right on both sides of the wall. That means flashing and siding that shed water outside, and drywall, texture and trim that blend in inside. Done well, nobody can tell a window was ever there.

When to Call a Pro

Removing a window touches framing, siding, flashing, drywall and paint, so it’s a good job to hand off. We’re local, licensed, bonded and insured, and we show up when we say we will. Thinking about removing a window, or rethinking a wall in Sherwood, Hillsboro, Beaverton, West Portland or nearby? Text us at (503) 567-1058 for a quote. Sending a few photos of the wall, inside and out, helps us get back to you faster.
Shed Rot Repair in West Portland: New Subfloor, Flashing & Cement Board Trim

Fall is here, and so is the steady Oregon rain. It’s also the time of year when small rot problems at the bottom of a backyard shed start to grow. This West Portland customer had a shed where dirt had built up against the back walls over time, and moisture did the rest: soft, broken siding along the base outside and a rotted section of floor inside. Brian came out to fix it.

What We Found

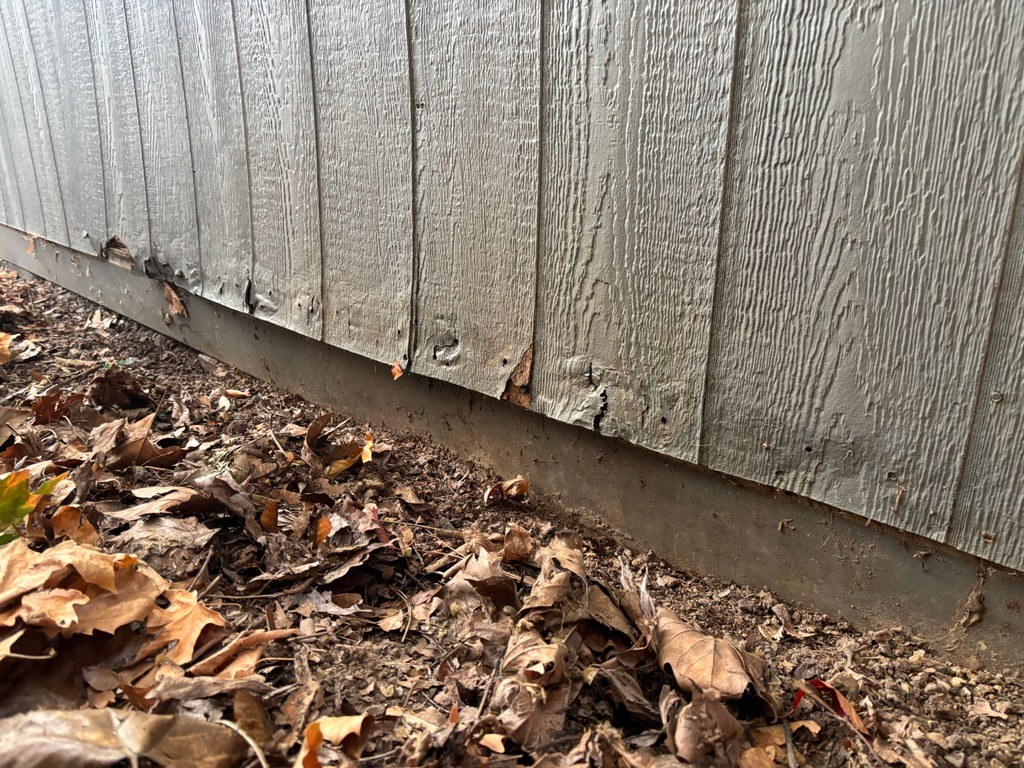
Outside, dirt and leaves sat right up against the bottom of the siding on the back two sides of the shed. The bottom edge of the siding was soft, chipped and breaking away.

Bottom edge of gray backyard shed siding chipped and rotting where dirt and fallen leaves are piled against the wall
Before: dirt and leaves piled against the shed, with soft, broken siding along the bottom edge.

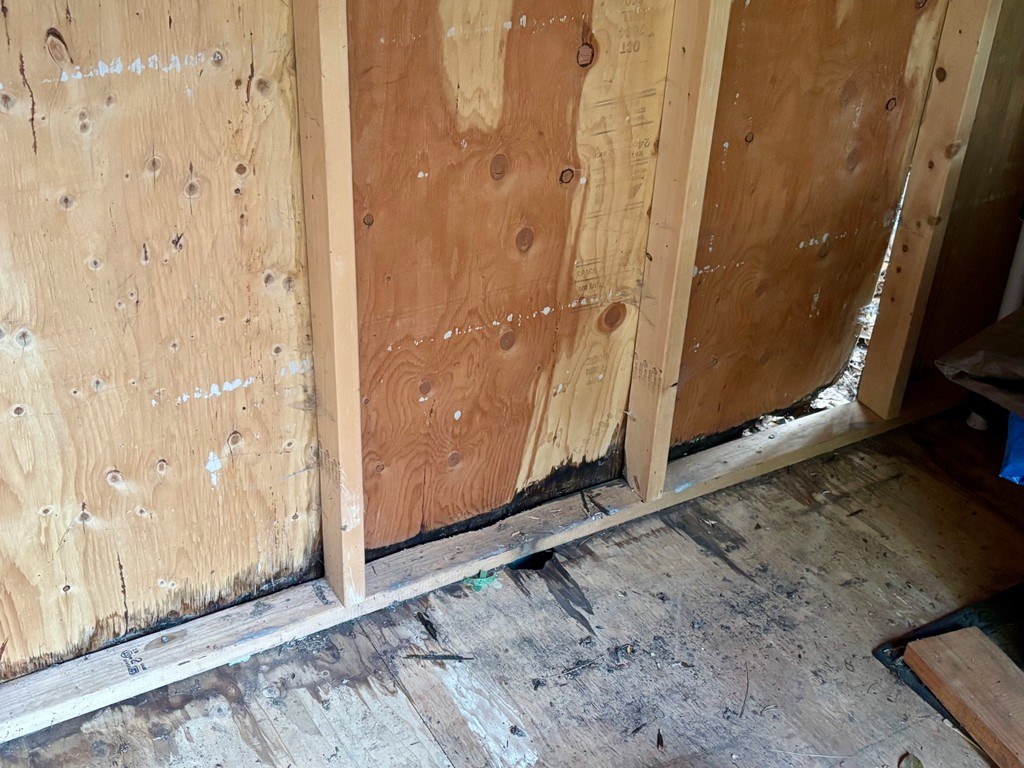
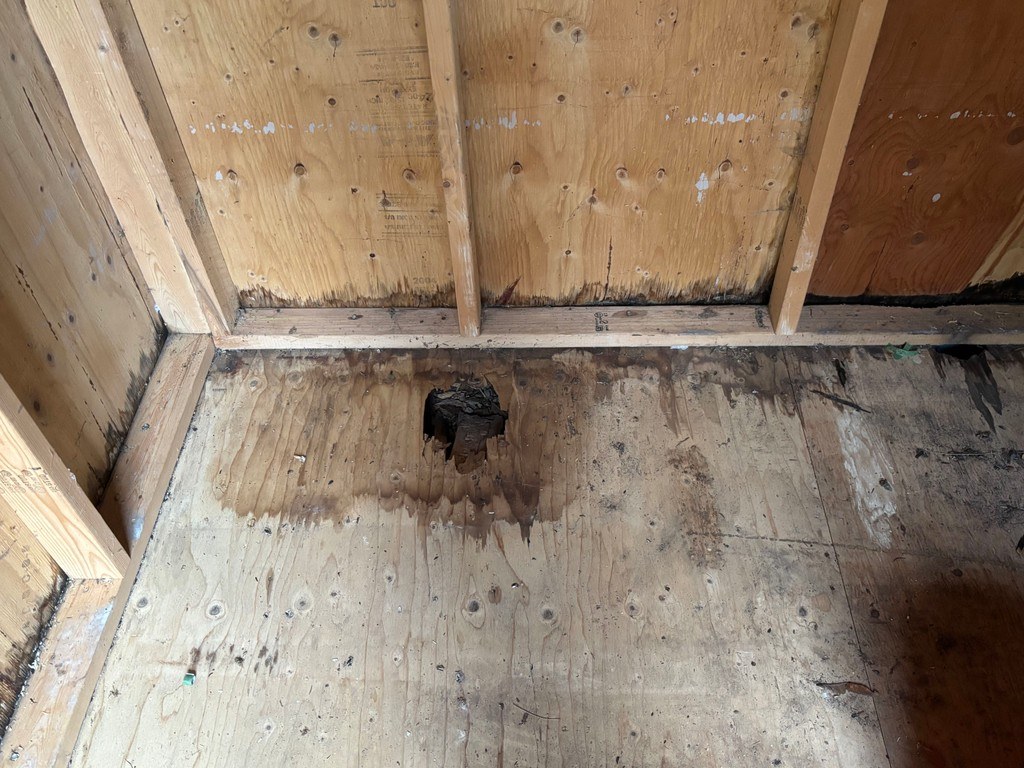
Inside, the damage was easy to see. The subfloor along the back wall was dark and stained, with a spot rotted all the way through. The bottom edges of the wall panels were darkened too.

Inside a backyard shed, plywood subfloor with dark water stains and a rotted hole near the wall, below darkened wall sheathing
Before: water-stained subfloor with a hole rotted through near the back wall.
Inside a shed, wall studs and plywood sheathing darkened and damaged along the bottom edge above a stained floor
Before: dark, damaged bottom edges on the wall panels where moisture got in.

Why Soil Against Siding Causes Rot

Siding is made to shed rain, not to sit in wet ground. When dirt, mulch or leaves pile up against a shed’s walls:

  • Water wicks up into the wood. The bottom edge of the siding stays wet and never fully dries out.
  • Our rainy season makes it worse. From fall through spring, Oregon’s cool, wet weather keeps that wood damp for months at a time.
  • Rot spreads inward. What starts in the siding can move into the framing and the floor inside.

Keeping soil and debris pulled back from the walls is one of the simplest ways to make a shed last.

How Brian Fixed It

Here’s what Brian did on this job:

  • Dug back the dirt that had piled against the back two sides of the shed, so the walls are no longer sitting in soil
  • Cut away the rotted siding along the bottom of the two damaged sides, about 5.5 inches up
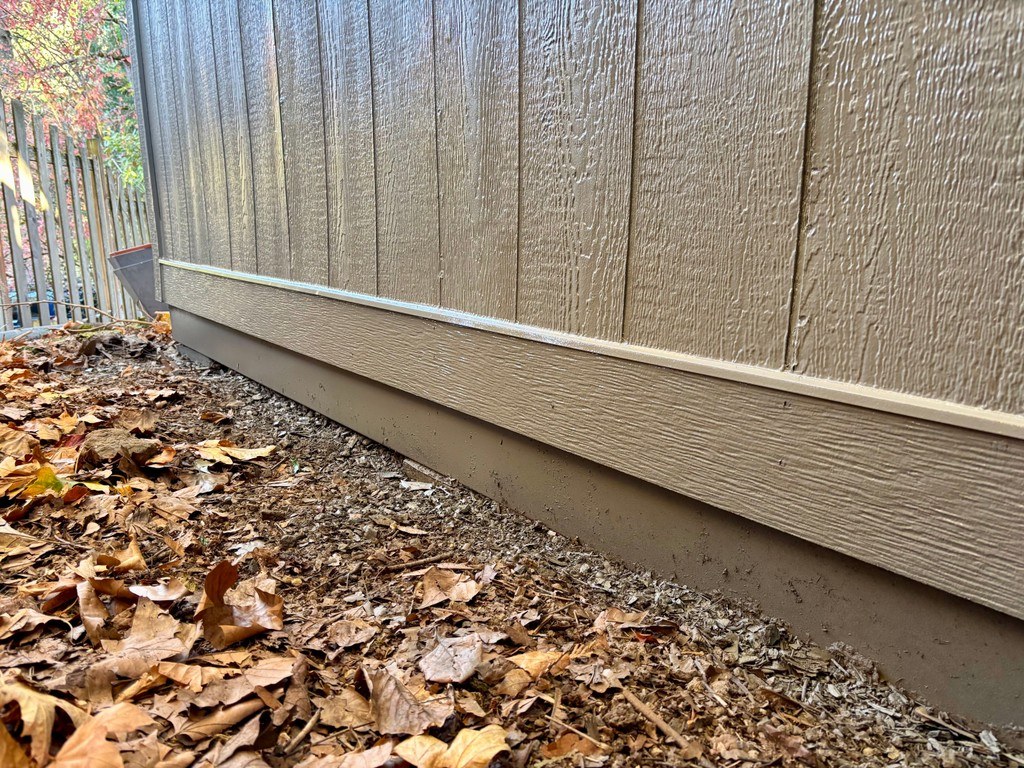
  • Installed flashing and new cement board trim along the base. Cement board holds up to moisture much better than wood, which makes it a good fit close to the ground
  • Painted the new trim
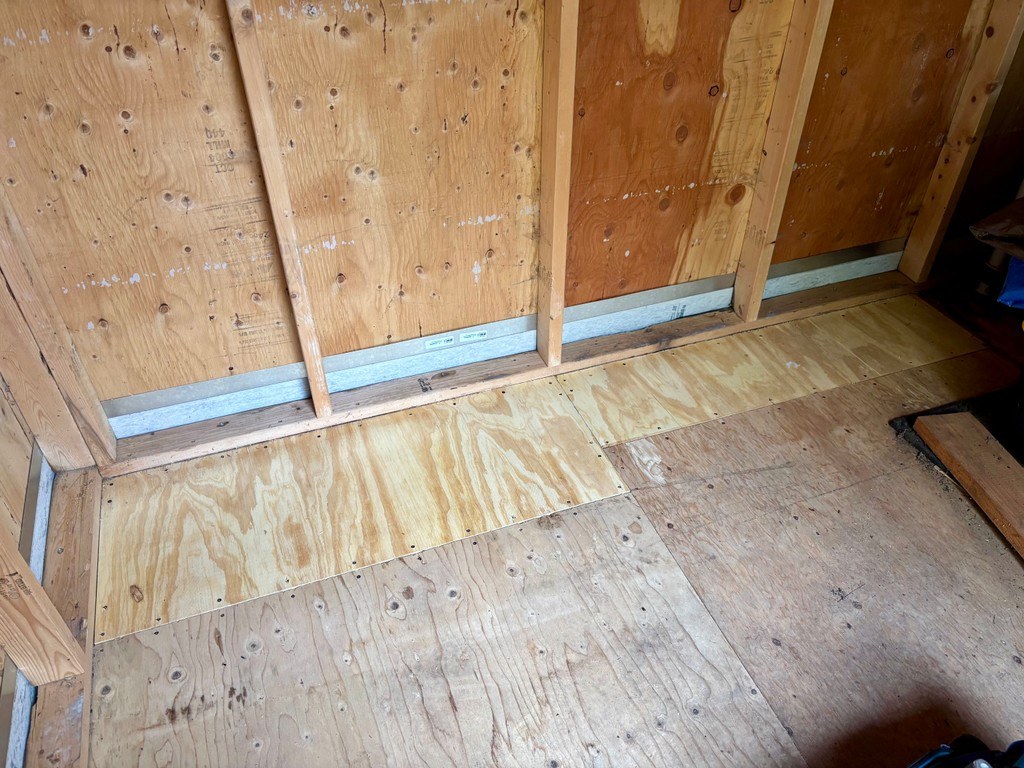
  • Inside, cut out the rotted section of subfloor and installed new subfloor, so the floor is solid underfoot again
Inside a backyard shed, new plywood subfloor pieces fitted along the base of the wall framing
After: new subfloor installed along the base of the walls.
Base of a tan backyard shed with new painted cement board trim and flashing along the bottom, with soil dug back from the wall
After: new flashing and painted cement board trim along the base of the shed, with the dirt dug back.

The flashing helps send water out and away from the wall, and the trim gives the bottom of the shed a clean, durable edge that’s ready for the wet months ahead.

Signs Your Shed Has Rot

It’s worth a quick walk around your shed this fall. Look for:

  • Soft, crumbly or chipped siding near the ground
  • Dark stains at the bottom of the inside walls or on the floor
  • A floor that feels spongy or gives a little when you step on it
  • Dirt, mulch or leaves piled against the walls
  • A musty smell inside

A simple test: press a screwdriver into the wood. If it sinks in easily, there’s likely rot.

When to Call a Pro

If you catch it early, pulling the dirt back and keeping the area clear may be all you need. But once rot has reached the floor or framing, or runs along a whole wall, it’s time to have it repaired. Fixing it now, before the heaviest winter rain, keeps a small repair from turning into a bigger one.

We’re local, licensed, bonded and insured, and we show up when we say we will. Have a shed in Hillsboro, Beaverton, West Portland or nearby that’s showing these signs? Text us at (503) 567-1058 for a quote. Sending a few photos of the problem areas helps us get back to you faster.